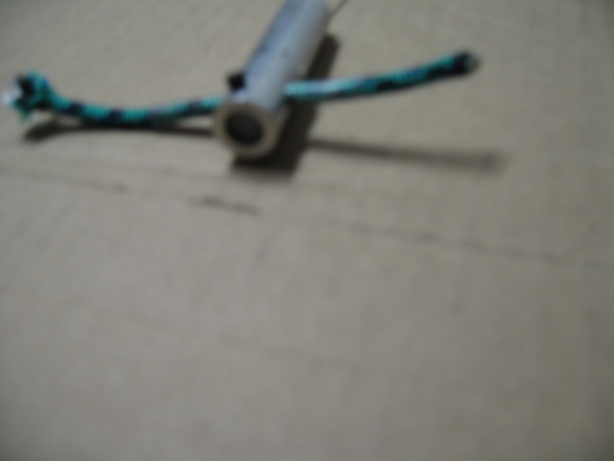
The line cutters are electrically actuated. They cut the drogue parachute line at low altitude to release the main parachute.
A DXF format drawing of the v2 cutters is available here. The drawing is also available in pdf format.)
The v2c cutters use an oil hardening steel piston actuator (labeled 'Cutter' in the drawings) which is explosively propelled inside an aluminum body tube. The piston has a circular wedge-shaped edge formed on a bench grinder, drilling the shear pin hole, cutting to length, heat treating the blank, and then sharpening the edge with a whetstone.
Attachments:
Links:
There were modifications made to the original line cutter design in order to address the stray-thread issues, as well as simplify fabrication, reproduction and assembly of the cutter. The main differences include the following:
Transition from circular cutter to wedge cutter. We have avoided the stray thread issue in doing so. Also simplified process to make sharp edge. Also avoid minor problem of material bunching up in the center hole of the cutter.
Moved to a 5/16 NC threaded back, simplifies igniter assembly by using a COTS 5/16 hex head bolt. Also allows you to remove the back of the cutter if you need to get stuff unstuck from inside.
Changed stop to a single piece of HDPE round (to be used once or twice each). These are very easy to turn out on a lathe. Added vent holes to the side of the cord to allow air to vent (was previously accomplished by hole in center of plastic tube stop.
Ensure that the grains of smokeless powder are immediately surrounding the igniter. The powder chosen does not ignite particularly easily and thus must be in close proximity to the igniter. Use proper amounts of putty to ensure this.
Testing:
All testing was done with off the shelf materials, including smokeless powder from the local sporting goods store and standard Estes igniters from the hobby shop. These igniters should be replaced with more appropriate e-matches for actual flights, but were well suited for our reliability testing.
During the testing phases there were a number of things identified as important properties for reliable operation of the cutter. As these were identified, minor tweaks were made to the design of the cutter to ensure the properties were held. Important properties are as follows (useful if/when one needs to re-design the cutters for different cord or for some other reason):
If the sheer pin chosen has too low of a sheer force, the chamber will not build up enough pressure for the smokeless powder to burn entirely. During initial testing with a smaller sized shear pin, after disassembling we'd find that about half the powder was left un-burned (even though the cutter still fully cut the line, which may imply that we could use less powder)
The dimensional relation ship between length of cutter, location of stop block, and location of vents is such that the cutter must penetrate the stop approximately 0.020" (aka, actually be forced through the line) before the vent holes are cleared. Given that smokeless powder burns more vigorously as the pressure increases, if the cutter has not completely cut the line, it will continue building pressure until it finally pushes through and clears the vent holes. Of note, it's designed such that the cutter will pene
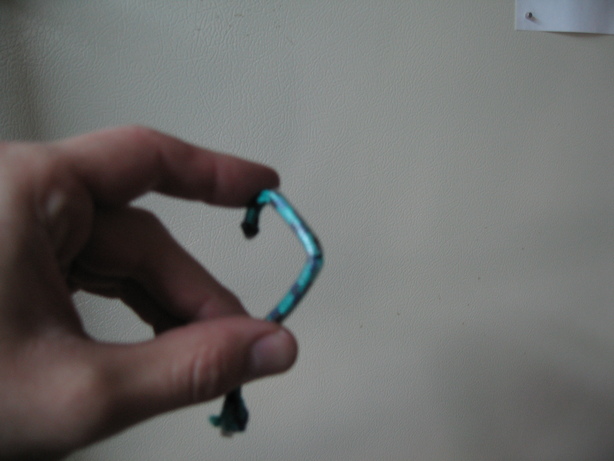
During testing we found that wrapping the line in something like electrical tape or heat shrink was helpful in creating a very clean cut.
The line we cut is 4 mm climbing accessory line which we get from REI inc., a local sporting goods retailer. The 4 mm line is a good choice in several ways. It's available locally at a moderate price, it has a believable load rating, and it's a robust line resistant to abrasion, kinking, etc.
I should look this up, but if I recall correctly, the price of 4 mm accessory line is about 25 cents per foot, and it has an 800 lbs load rating. Accessory line is a low stretch line with a core of relatively straight fibers and a braided cover of very fine threads which protect the core from abrasion and other damage.
By its nature, the piston actuator used in the LV2c cutter requires fairly close tolerance to get a good gas seal, but some gap between the piston and the body must exist to allow movement of the piston.
Tentative bill of materials and sourcing
- 5/8" OD 6061-T6 aluminum round, onlinemetals.com
- Coil Wire (awg?), digikey
- 5/16 NC hex bolts, Ace Hardware
- Nylon Washer, Ace hardware
- 4-40 Stop Screw, Ace Hardware
- Epoxy, Hobby shop
- HDPE Stop, Multicraft Plastics
- O2 Hardening 3/8" dia rod, where from?
- 4mm Accessory Cord, REI
- Heat Shrink, digikey
- Shear Pin, small parts inc, maybe multicraft plastics
- IMR-7828 Smokeless Powder, GI-Joes sporting goods
Body Jig Fabrication:
- Take a piece of steel square bar, bore out a 5/8" hole
- Drill holes, sized correctly, at appropriate locations in the jig body.
- Drill a hole suitable for 10-24 threading, thread, use set screw when drilling holes in side of body.
Cutter Jig Fabrication
- Take a piece of steel square bar, bore out a 3/8" hole.
- Drill a hole for a 10-24 set screw
- Drill a hole at the right distance from the end for drilling the shear pin hole.
Body Fabrication:
- Rough cut a piece of 5/8 aluminum round bar
- Mount in lathe head with collet
- Face off end
- Drill undersized 3/8 hole to proper depth
- Drill F through end of body
- Ream out 3/8 hole
- Flip in collet
- Face off rough end
- Remove, measure to find length error
- Re mount in collet
- Remove length error
- Use center drill/counter sink to chafer ID of F drill hole
- Tap with 5/16 dap, utilize tailstock jacobs chuck and tap handle to keep alignment
- Mount body in jig and drill on drill press.
Cutter Fabrication:
- Take length of 3/8" precision ground oil hardening tool steel
- Put in cutter jig, with some length sticking out the end
- Take to bench grinder, grind 60 degree angle. Use jig to provide proper 180 degree flip and yield a right angle cutter tip
- Re-align rod in jig so it's proper length from cutter end
- Drill shear pin hole in drill press
- Rough-cut cutter from end of rod (use metal bandsaw or other tool)
- Mount in lathe
- Finish rough cut end to proper length
- Heat cutter till red hot with propane torch
- Quickly drop in motor oil to quench/harden
- Take some 600 grit sand paper and do a couple passes by hand around OD of cutter to remove black coating left by hardening
Hex Igniter Fabrication:
- Put hex-nut on bolt
- Mount in 3-jaw lathe chuck
- Drill clearance hole in top of bolt to proper depth
- Flip in chuck
- Face front of bolt slightly so its at a clean right angle
- Use coupler and jig for drilling wire lead holes in end of bolt on drill press
- Cuter coil wires to length (1-2 inches long)
- De-insulate ends
- Make up epoxy
- Fill clearance hole with epoxy
- Insert coil wires through epoxy and make sure epoxy fills lead wire holes, make sure coil wires protrude through end of hex bolt 0.15" to 0.25" as you see fit.
Stop Fabrication:
- Mount HDPE rod in lathe
- Turn down OD to proper radius
- Part off stops to proper length.
Assembly Instructions:
1) Clean body, including shear pin holes, inspect for nicks and gouges. A couple turns by hand with a 3/8 reamer can be helpful. You may need to sand the OD of the cutter with some 600+ grit sand paper to get the deposits off of it.
2) Clean cutter including shear pin holes
3) Verify cutter will travel past shear pin holes
4) Document body and cutter number
5) Select Igniter
6) DANGEROUS: Wear safety glasses! As of yet, after doing 25-30 or so of these, we have not had a soldering iron set off an ematch, but be careful. 800 degrees on the iron seems ok... Solder igniter to interior lead wires of hex bolt.

7) Place putty below igniter up to slightly below combustible material
8) Add 55 grains of IMR-7828 smokeless powder. A small funnel with a tub off the bottom is helpful for getting all the grains into the line cutter.
9) Pack wadding over powder (about 1/2" x 1" of single ply tissue) (Wadding should gently press on the powder with the cutter in place.)
10) Use safety tool to place cutter.
11) Place shear pin, use ABS cement to soften/thin pins.
12) Insert stop and screw, verify correct stop point
13) Insert 4mm line
Pictures and Videos:

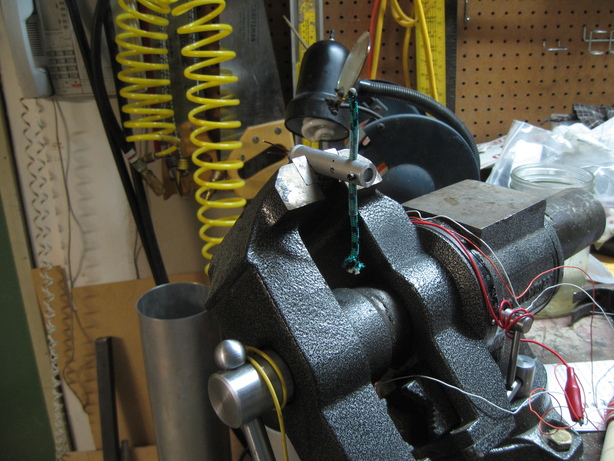
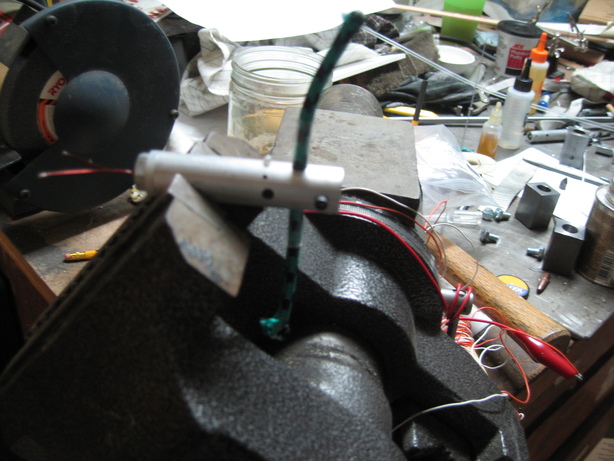
Videos of final versions of line cutter with 100% success rate:
Videos of intermediate tests which were mostly successful but had something that was sub-optimal, typically described as "annoying to fabricate", or "annoying to assemble/disassemble", "overly complex", "stickier then necessary" or various other hand-wavy "issues". Each test had minor modifications to the design to address whatever the annoyance at hand was. In each case, the line was cut cleanly and in the worst case you had to pull a little for it to come loose, but the fundamentals of the device appeared to be sound.
- lineCutterTestingVideo4.avi
- lineCutterTestingVideo5.avi
- lineCutterTestingVideo6.avi
- lineCutterTestingVideo7.avi
- lineCutterTestingVideo8.avi
- lineCutterTestingVideo9.avi
- lineCutterTestingVideo10.avi
Videos of Early Tests with various modes of failure which were easily solved in subsequent iterations: